Procedure Reader Normalization
Preparation
- Wear latex gloves while handling normalization cartridges to prevent and minimize the transfer of oils and debris to the surface of the normalization card, which may affect the signal intensity readings.
- Verify the calibration date on the normalizer cards. The date of manufacture/test is printed on each normalizer card (YY-MM-DD). Verify that the cards have not expired before use. Do not use cards that are older than 1-year from the date of manufacture. Record the normalizer card serial number in the work order notes.
- When not being used in this normalization procedure, the normalization cards should be stored and kept in an air-tight and light resistant envelope or container at all times.
- Inspect the normalization cards for any signs of damage or contamination. This may include melted areas of the card, scratches, marks, dust, debris, or residue. If the cartridges are dirty, clean the areas around the label with a damp, non-abrasive cloth wetted with water.
Do not expose the cartridges to bleach or solvent based cleaners other than limited exposure to Isopropyl alcohol (less than 99%).
If the card shows visible damage or contamination that cannot be easily removed with a damp, non-abrasive cloth, replace the normalization card prior to executing this procedure.
Normalization Procedure
- Press the Log In button.
- Enter FSVC in the User Name field.
- Enter the Service Password in the Password field.
- Select the Maintenance tab.
- Select the Field Service tab.
- Using the scroll bar on the right side of the screen, scroll down and press the Script- O-Matic button to launch Script-O-Matic.
- When Script-O-Matic launches, press the Connections button from the main menu.
- If renormalizing Reader A, press the middle Connect button to connect to Dewey. If renormalizing Reader B, press the last Connect button to connect to Louie.
- Press the Close button to close the MUX Connections window.
- If renormalizing Reader A, select the Dewey tab. If renormalizing Reader B, select the Louie tab.
- If the instrument door is closed, press the Unlock Door button in Script-O-Matic.
- Press the Run Script button.Select opticsUtility.script from the Script drop-down menu and press OK to continue. If the opticsUtility script is not displayed in the drop-down menu, stop, andfollow the Global Escalation Process and escalate to the System Support Specialist. Click on the text entry field in the Win Script-O-Matic screen and type 2 and ENTER to select Field Normalization.
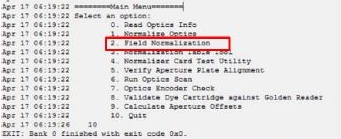
Fig: Field Normalization in Script-O-Matic
- When prompted Enter target side (dewey/louie), type dewey for the left side or type louie to select the right side of the instrument. Then press ENTER.
- When prompted Verbose Mode?? [Y/N] (Default = N), press ENTER without entering any text to select non-verbose mode by default.
Verbose mode does not affect the method used to determine the normalization constants. This mode provides the ability to output informational messages that may be useful for Engineering to debug and root cause any potential problems with the Normalization routine.
- When prompted Enter the Operator Name, enter your full name and press ENTER.
- Remove the Red Normalizer card from its protective pouch and place it, label side up, on the desired MUX.
- When prompted, scan the 2D barcode on the card label using a 2D barcode scanner. Characters from the barcode will be displayed in the user entry field. After scanning the barcode, wait several seconds until all characters have been displayed.
- If the script does not advance automatically, it may be necessary to press ENTER after scanning the label to continue.
- If the barcode fails to scan, contact your Regional Support Specialist.
Some 2D barcode scanner models will automatically press ENTER . With these models, the script will advance automatically.
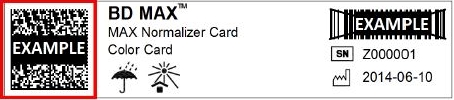
Fig: Barcode example highlighting 2D barcode
- When the tray opens, return the Red Normalizer card into its protective pouch and close the zippered seal on the pouch.
- Remove the Green Normalizer card from its protective pouch and place it (label side up) on the desired MUX.
- Scan the 2D barcode on the card label.
Failures must be accepted prior, or else the drawer will not open.
- When the tray opens, return the Green Normalizer card into its protective pouch and close the zippered seal on the pouch.
- If no warning messages are displayed after the Green Normalizer card has been ejected, enter Y when prompted “Do you want to write normalizer data to the optics head? [Y/N]” to write the new normalization values to the optics head and jump to Step 23 below; otherwise, continue to the next step.
If warning messages are displayed, follow the instructions in Handling Normalization Errors and Warnings to clear each warning from the screen. If any warning indicates an AF value greater than the upper AF limit, cancel the Normalization; the reader should be replaced at the end of this procedure. Follow Table 10 below. Only the assays using the channel that are out of limit will be affected. The other can continue to be processed.
- Enter Y and ENTER when prompted Do you want to write normalizer data to the optics head? [Y/N] and then enter a Y and ENTER again when prompted Are you sure you want to write normalizer data to the optics head? [Y/N].
- The script should returns to the optics Utility.script Main Menu.
- If you wish to renormalize the other reader at this point, type 2 and ENTER to select Field Normalization then repeat Steps 11 through 26.
- If wish to exit, type 10 and press ENTER to exit the optics Utility.script.
- Proceed with Instrument Qualification following Qualification Run